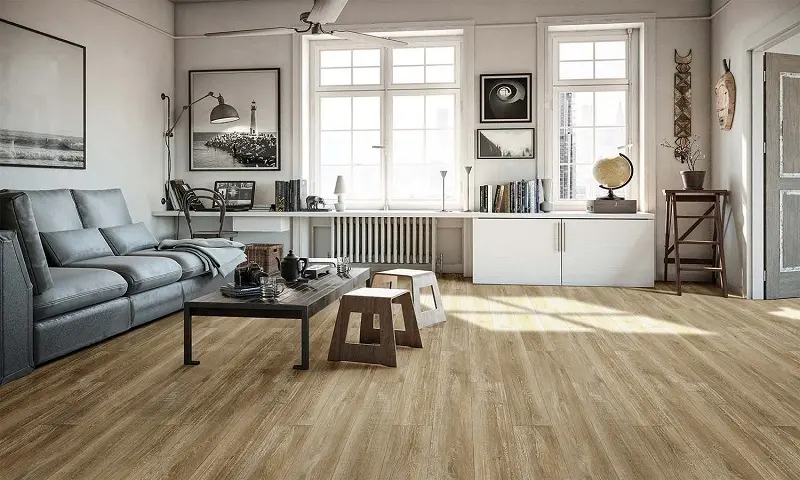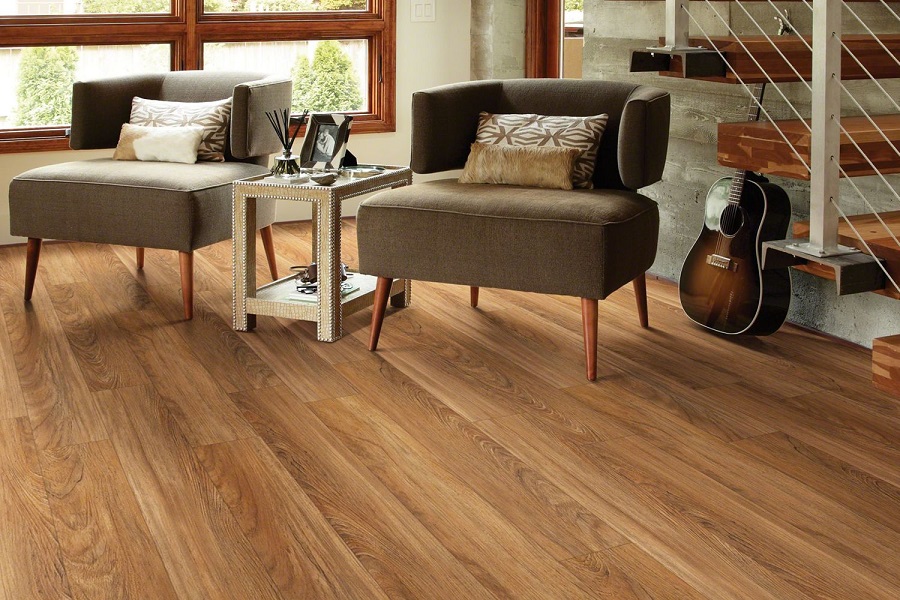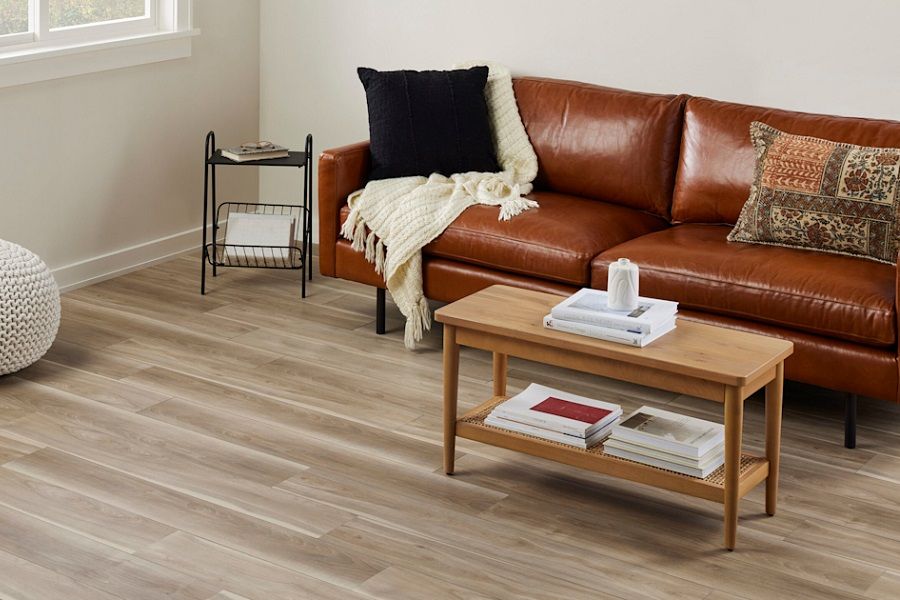

Laying laminate flooring is one of the few big jobs in a home that a total beginner can finish in a weekend. There is no glue, no nails, and no messy screed in most cases. The planks simply click together and float on top of the subfloor.
This Floor Mat guide (how to lay laminate flooring) walks you through every stage, from working out how many packs to buy, to cutting a neat hole around a radiator pipe. It also covers the parts that most guides skip, such as moisture testing, what to do when your walls are not straight, and how to fix a gap that appears six months later.
1. What Laminate Flooring Is and How It Works
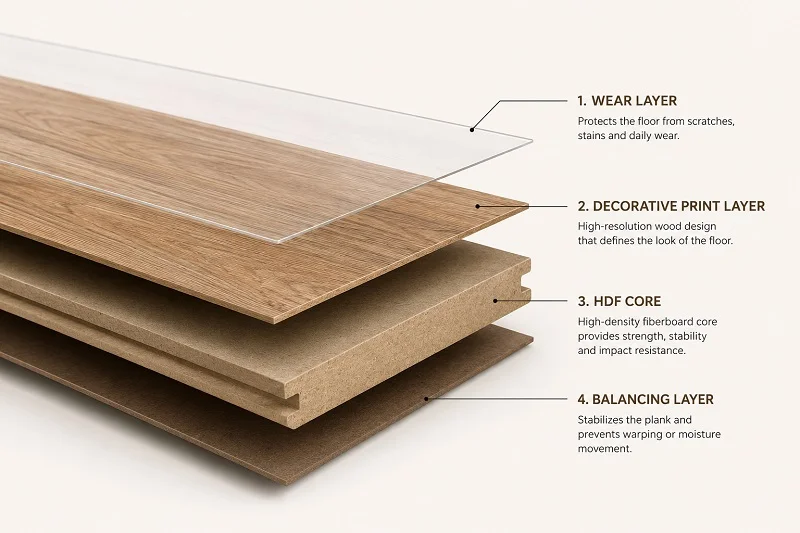
Laminate flooring is a man-made board built in four layers. The core is high-density fibreboard (HDF). On top of that sits a printed photo layer that copies the look of oak, walnut or stone. Over the print is a clear wear layer that takes the daily scratches. Underneath is a balancing layer that stops the plank from bending.
The important part for fitting is the click system on the edges. Each plank has a tongue on two sides and a groove on the other two. You angle the tongue into the groove and press down until it clicks. Nothing is glued or nailed.
This is called a floating floor. The whole floor sits loose on top of the underlay and moves as one big sheet. That movement is the reason expansion gaps matter so much later in this guide.
Understanding AC Ratings
AC ratings tell you how tough the wear layer is. Pick the right one and your floor lasts years longer.
| AC Rating | Best for | Typical rooms |
| AC1 | Very light use | Cupboards, spare bedrooms |
| AC2 | Light use | Bedrooms, adult-only spaces |
| AC3 | Normal home use | Living rooms, kitchens, most homes |
| AC4 | Heavy home use, light commercial | Hallways, homes with dogs and kids |
| AC5 | Commercial use | Shops, offices, busy entrance halls |
For most homes, AC3 is the sensible minimum. For a hallway or a house with pets, go for AC4.
Thickness Guide
| Thickness | What it feels like |
| 6mm to 7mm | Budget option. Sounds hollow and shows subfloor dips. |
| 8mm | The most common choice. Good balance of price and feel. |
| 10mm to 12mm | Feels solid underfoot, quieter, hides small subfloor faults better. |
2. Can You Fit Laminate Flooring Yourself?
Yes. Fitting laminate flooring is rated as a beginner level DIY job by most flooring makers, and it is the most popular DIY floor in the UK for that reason.
You need to be able to:
- Measure and mark a straight line
- Use a saw safely
- Kneel and work on the floor for a few hours
You do not need any trade experience. The click system does the hard part for you.
Choose a pro instead if: your subfloor is badly uneven, you have a lot of curved walls, you are fitting up a staircase, or you are laying herringbone for the first time in a large open space.
3. How Long Does It Take?
Times below are for one adult working alone, including subfloor prep but not including the 48 hour acclimatisation.
| Room size | Simple square room | Room with lots of cuts |
| 10m² bedroom | 3 to 4 hours | 5 to 6 hours |
| 20m² living room | 6 to 8 hours | 9 to 11 hours |
| 30m² open plan space | 9 to 12 hours | 13 to 16 hours |
| Hallway with 4 doors | 3 to 5 hours | 6 to 8 hours |
Two people will roughly halve these times, because one can cut while the other lays.
Add extra time if you need to level the subfloor. Self levelling compound needs 24 to 48 hours to dry before you can walk on it.
4. Cost of DIY Laminate Flooring vs Hiring a Fitter
Prices change often, so treat these as planning figures and check current rates with your supplier.
| Item | Typical DIY cost |
| Laminate planks | £8 to £30 per m² |
| Underlay | £3 to £9 per m² |
| Damp proof membrane | £1 to £3 per m² |
| Spacers, tapping block, pull bar kit | £10 to £25 one off |
| Scotia beading or new skirting | £3 to £8 per metre |
| Door threshold bars | £8 to £20 each |
| Silicone sealant for wet rooms | £6 to £12 |
Labour from a fitter usually adds £8 to £18 per m², plus extra for removing the old floor and moving furniture.
Example: a 20m² living room with mid range 8mm laminate might cost around £350 to £450 in materials if you do it yourself, and roughly £550 to £750 with a fitter. Doing it yourself usually saves between 30% and 45% of the total.
5. Tools You Need
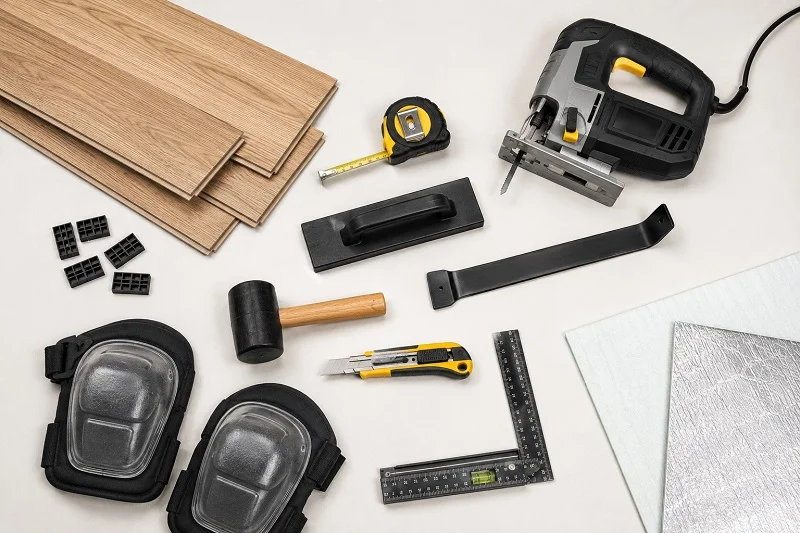
Must have tools
| Tool | What you use it for |
| Tape measure | Measuring the room and every plank |
| Pencil | Marking cut lines |
| Set square or combination square | Marking straight lines across a plank |
| Handsaw or jigsaw | Cutting planks to length and shape |
| 10mm spacers | Holding the expansion gap at the walls |
| Tapping block | Closing joints without damaging the plank edge |
| Pull bar | Pulling the last plank in each row tight |
| Rubber mallet | Tapping planks together gently |
| Utility knife | Trimming underlay |
| Knee pads | Saving your knees over several hours |
Tools that make the job easier
| Tool | Why it helps |
| Mitre saw or chop saw | Fast, clean, repeatable end cuts |
| Circular saw | Long rip cuts down the length of a plank |
| Jigsaw with a fine tooth blade | Curves, pipe cuts and awkward shapes |
| Oscillating multi tool | Undercutting door frames neatly |
| Drill with flat wood bits | Drilling clean holes for pipes |
| Long spirit level or straight edge | Checking the subfloor is flat |
| Moisture meter | Testing concrete and timber subfloors |
| Laser level or chalk line | Setting a perfectly straight first row |
| Vacuum | Getting the subfloor properly clean |
Safety kit
Safety glasses, a dust mask, work gloves and ear defenders when using power saws. Laminate dust is fine and sharp, so always cut outside or in a well aired space.
Money saving tip: most tool hire shops rent a mitre saw for a day for less than the cost of buying one. If this is a one off job, hire rather than buy.
6. Materials You Need
- Laminate planks with 10% or 15% extra for waste
- Underlay suited to your subfloor
- Damp proof membrane if you are laying over concrete and your underlay does not already include one
- Underlay tape or aluminium tape to join the sheets
- Scotia beading or new skirting boards to hide the expansion gap
- Door threshold bars, one for every doorway
- Grab adhesive or pins for fixing the beading to the skirting
- Flexible silicone for kitchens, bathrooms and utility rooms
- Wood filler or repair kit in a matching shade for small chips
7. How Much Laminate to Buy
Getting this right saves both money and a second trip to the shop.
Step 1: Measure the room
Measure the length and the width in metres. Multiply them together.
Example: 5.2m x 4.0m = 20.8m²
For an L shaped room, split it into two rectangles, work out each one, then add them together.
Step 2: Add waste
| Layout | Waste to add |
| Straight planks, simple square room | 10% |
| Straight planks, room with many corners | 12% |
| Diagonal layout | 15% |
| Herringbone | 15% to 20% |
Example: 20.8m² + 10% = 22.9m²
Step 3: Work out the packs
Check the coverage printed on the pack. Most 8mm packs cover between 1.8m² and 2.5m².
Example: 22.9 ÷ 2.2 = 10.4, so buy 11 packs.
Step 4: Buy the same batch
Always buy every pack from one batch number. Different batches can vary slightly in shade. Keep one spare pack in a dry cupboard for future repairs, because ranges get discontinued.
8. Choosing the Right Underlay
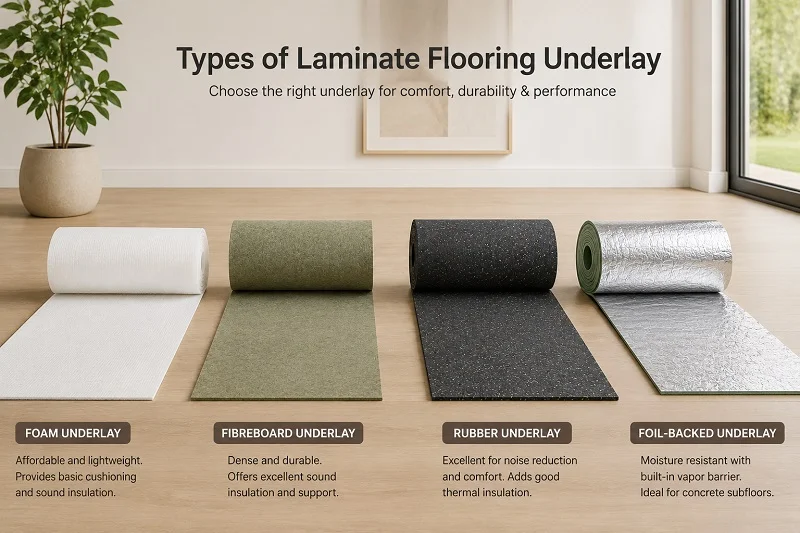
Underlay is not optional. It smooths out tiny bumps, cushions your steps, cuts noise and blocks moisture. A good underlay makes a cheap floor feel much better.
| Underlay type | Best for | Notes |
| Foam (PE) | Wooden subfloors, tight budgets | Basic cushioning and sound |
| Combined 3 in 1 foam | Concrete floors | Includes a built in damp proof layer |
| Fibreboard | Slightly uneven subfloors | Best levelling ability, feels solid |
| Rubber or crumb | Flats and upstairs rooms | Best noise reduction for neighbours |
| Thin low tog foil backed | Underfloor heating | Lets heat pass through quickly |
Matching underlay to your situation
- Concrete or screed subfloor: you must have a damp proof membrane. Either use a 3 in 1 underlay or lay a separate 1000 gauge polythene sheet first.
- Timber floorboards or chipboard: a standard foam or fibreboard underlay is fine. Skip the membrane, because timber floors need to breathe from below.
- Underfloor heating: keep the total tog value of underlay plus laminate below 2.5 tog. Anything higher traps the heat and your system will never warm the room properly.
- Some laminate already has underlay stuck to the back. If yours does, do not add a second layer. Just lay a damp proof membrane over concrete.
9. Preparing the Subfloor
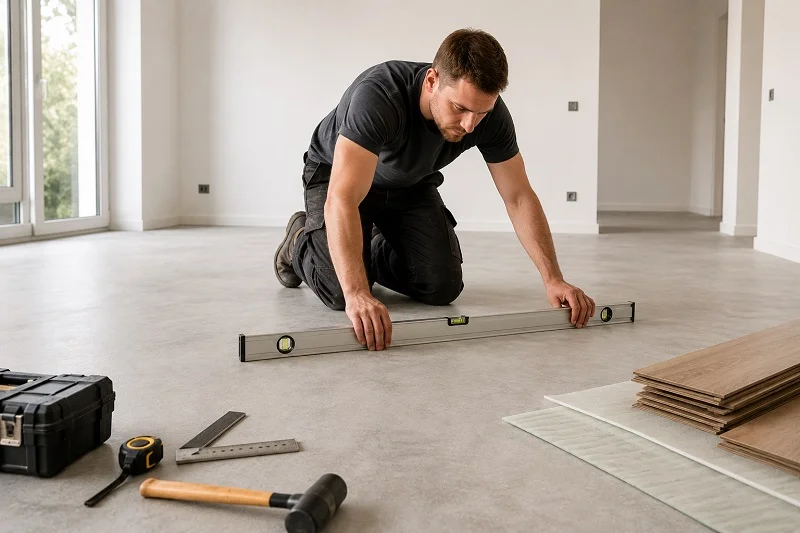
This is the stage people rush, and it causes more failed floors than anything else. Your new floor can only ever be as flat as what sits underneath it.
The flatness rule
Lay a 2 meter straight edge or long spirit level on the floor. Slide it around the room. If you find any gap under it bigger than 3mm, that spot needs fixing.
- Concrete: grind down high spots and fill low spots with self levelling compound. Let it dry fully.
- Timber: screw down any loose boards, punch nail heads below the surface, and replace rotten boards. For badly worn boards, screw down 6mm plywood sheets across the whole room.
- Old tiles: fill the grout lines with a levelling compound if they are wider than 4mm, and replace any cracked or drummy tiles.
The moisture rule
Moisture rising through a subfloor swells the HDF core and ruins the floor from below.
- Concrete: the reading should be at or below 2.5% moisture content on a carbide meter, or below 75% relative humidity on a hygrometer. New concrete needs about one day of drying per millimetre of thickness, so a 50mm screed can take months.
- Timber: aim for 12% moisture content or lower.
- Quick home test: tape a 600mm square of clear polythene to the concrete, sealing all four edges. Leave it for 24 hours. If you see any beads of water or a dark patch underneath, the slab is still damp.
Cleaning
Sweep, then vacuum properly. A single stone left under the underlay will show as a bump for the life of the floor.
10. Step by Step: How to Lay Laminate Flooring
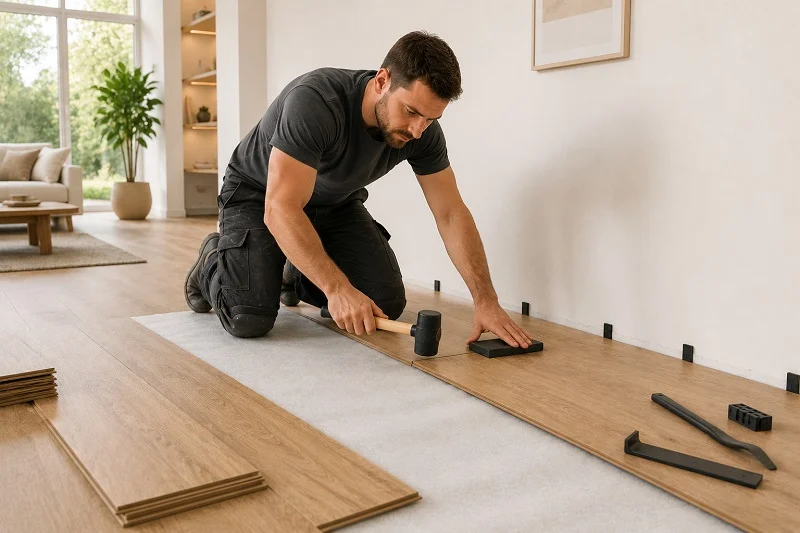
Step 1: Clear the room and take up the old floor
Move out all furniture, including curtains that touch the floor. Take up carpet, underlay and gripper rods. Pull out any staples or tacks with pliers. Vinyl can often stay if it is stuck down well and flat, but loose sheet vinyl must come up.
Decide now whether to remove the skirting boards. Taking them off gives the cleanest possible finish because the flooring tucks right underneath and no beading is needed. Leaving them on is faster but you will need scotia beading to hide the gap.
Step 2: Fix and clean the subfloor
Follow section 9. Level, dry and clean. Do not move on until the straight edge test passes.
Step 3: Acclimatise the planks
Bring the sealed packs into the room where they will be fitted. Lay them flat, stacked no more than three or four packs high, away from radiators and outside doors.
Leave them for 48 hours. Keep the room between 18°C and 24°C with humidity between 45% and 65%.
Acclimatising lets the boards settle to the moisture level of the room. Skip this and the floor will either shrink and open up gaps, or swell and lift at the edges.
If you have underfloor heating, switch it off 48 hours before fitting and leave it off until 48 hours after.
Step 4: Plan your layout
Three decisions to make before a single plank goes down.
Which direction should the planks run?
- Run them along the longest wall in the room. This is the standard rule and makes the room feel bigger.
- Run them towards the main window so the light travels along the boards and hides the joints.
- On a timber subfloor, run them across the joists, not along them.
- In a hallway, always run them along the length of the hall.
How wide will your last row be?
Divide the room width by the plank width.
Example: room is 4000mm wide, planks are 190mm wide. 4000 ÷ 190 = 21.05 rows.
That means the final row would be tiny, around 10mm. That is fragile and looks poor. The fix is to cut the first row narrower so the first and last rows match. Add one full plank width to the leftover width, then halve it.
10mm + 190mm = 200mm, and 200 ÷ 2 = 100mm. So cut both the first and last rows to 100mm.
Never end with a strip narrower than 50mm.
Where will you start?
Start in the left corner of the longest wall and work from left to right, moving away from that wall. If the door is on a short wall, start at the door end so the neat factory edge lands at the threshold.
Step 5: Undercut the door frames
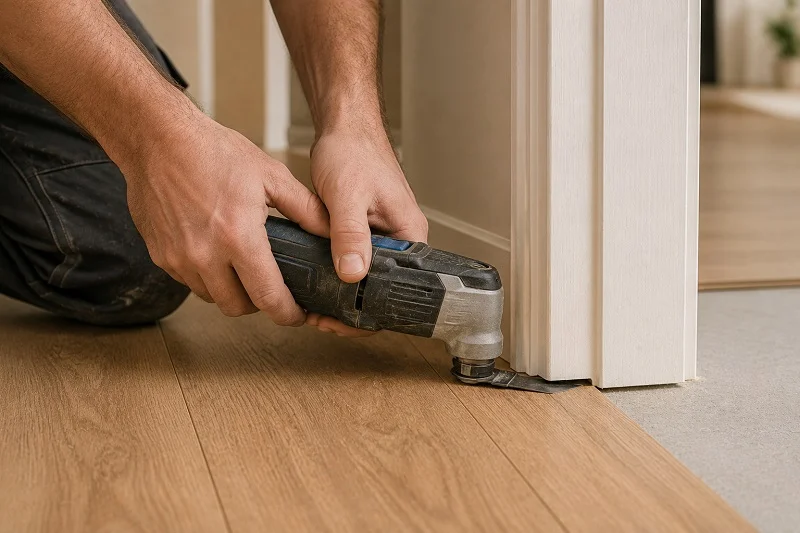
This one trick separates a DIY floor from a professional one. Cutting a plank to wrap around a door frame never looks neat. Cutting the frame instead does.
- Lay an offcut of laminate on a scrap of underlay next to the frame.
- Rest your saw flat on that offcut and mark the height.
- Use a flush cut saw or an oscillating multi tool to cut the architrave at that height.
- Clear the sawdust out.
Your plank now slides underneath, and the join is hidden.
Also check your door still clears the new floor. Laminate plus underlay usually adds 10mm to 14mm. If the door catches, take it off and trim the bottom.
Step 6: Roll out the underlay
- Lay the first roll along the same direction as your planks will run.
- Push it right up to the wall. If it is a damp proof type, run it 50mm up the wall and trim it later.
- Butt the edges together. Never overlap them. Overlaps create a ridge you will feel with every step.
- Tape the seams with underlay tape or the self adhesive strip.
- Only roll out two or three rows at a time. Walking on loose underlay all day will tear it.
If you are using a separate damp proof membrane, lay that first, overlap those sheets by 200mm, tape them, then put the underlay on top.
Step 7: Lay the first row
The first row sets the whole floor. Take your time here.
- Open three or four packs and mix the planks. This spreads out the colour and grain variation so no two similar boards sit side by side.
- Place the first plank in the corner with the tongue side facing the wall. Some fitters trim the tongue off for a flatter fit against the wall.
- Push 10mm spacers between the plank and the wall, on the long side and the short side.
- Take the second plank, angle the short end into the first at about 30 degrees, and lower it down until it clicks.
- Keep going to the end of the row.
- Measure the last gap, deduct 10mm for the expansion gap, and cut a plank to fit. Use the pull bar to pull it tight.
Check for straightness before you go further. Walls are rarely straight. Run a string line or a laser along the row. If the wall bows, keep the row straight and scribe the plank edges to follow the wall shape instead.
Step 8: Start the second row and set your stagger
Use the offcut from the end of row one to start row two. This saves material and creates the stagger automatically.
The stagger rules:
- End joints must be at least 300mm apart from the row before.
- Never line up end joints in rows one, two and three to form a staircase pattern. It looks unnatural and weakens the floor.
- Keep the pattern random. Cut a few planks to different lengths at the start so you always have varied pieces to hand.
- Never use an offcut shorter than 300mm.
To join a new row, angle the long edge of the plank into the row above, press it down until it clicks, then use the tapping block and mallet on the short end to close the joint fully.
Never hit a plank directly with the mallet. Always use the tapping block, or you will crush the tongue.
Step 9: Keep laying and check as you go
Work row by row across the room. Every three or four rows, do these checks:
- Kneel down and look along the joints. Any gaps? Tap them closed now, not later.
- Run your hand along the joints. Any lipping where one plank sits higher? Lift and refit it.
- Are the spacers still all in place along the walls?
If a plank will not click in, do not force it. Lift it out and check for debris in the groove. A tiny chip of HDF is usually the culprit.
Step 10: Cut and fit around obstacles
See section 12 for pipes, radiators and awkward shapes.
Step 11: Fit the final row
The last row is nearly always narrower than a full plank, and there is no room to swing a mallet.
- Measure the gap at several points along the wall, because the wall may not be parallel.
- Deduct 10mm for the expansion gap.
- Transfer those measurements to the plank and cut it lengthways with a jigsaw or circular saw.
- Slide it into place at an angle and pull it home with the pull bar and mallet.
If the wall is very uneven, hold the plank over the space and scribe the wall shape onto it with a pencil and a small block of wood.
Step 12: Finish the edges
- Take out every spacer.
- Refit the skirting boards, or fix scotia beading to the skirting. Pin the beading to the skirting board, never to the floor. The floor must stay free to move.
- Fit threshold bars or door profiles at every doorway. The 10mm expansion gap must run through the doorway too, so the floor in each room can move on its own.
- In kitchens, bathrooms and utility rooms, run a bead of flexible silicone into the expansion gap around the edges and around pipes before you fit the beading. This stops spills reaching the HDF core.
- Vacuum, then clean with a barely damp mop.
- Fit felt pads to every chair and table leg before the furniture comes back.
One more rule: if the room is longer than 12 metres in either direction, or if the floor runs through a doorway into another room, you need an expansion joint at that point. Very long unbroken runs of laminate will buckle.
11. How to Cut Laminate Flooring Without Chipping

The wear layer on laminate is hard and brittle, so the edge chips easily if you cut it the wrong way.
The rule to remember: the blade should enter through the decorative face.
| Saw | Blade direction | Which way up? |
| Handsaw | Cuts on the push | Face up |
| Mitre or chop saw | Cuts downward | Face up |
| Circular saw | Cuts upward | Face down |
| Jigsaw | Cuts upward | Face down |
| Table saw | Cuts upward | Face down |
More cutting tips
- Use a fine tooth blade. For a mitre saw, look for 60 teeth or more. For a jigsaw, use a blade made for laminate with downward facing teeth.
- Stick masking tape over your cut line. It holds the surface together and gives you a clear line to follow.
- Support the plank properly on a workbench or saw horses. A plank that flexes mid cut will chip.
- Cut slowly and let the blade do the work.
- Cut outside if you can. Laminate dust is fine, sharp and gets everywhere.
- A manual laminate cutter, which works like a big guillotine, gives clean dust free straight cuts and is quick to hire.
12. Fitting Around Pipes, Radiators and Door Frames
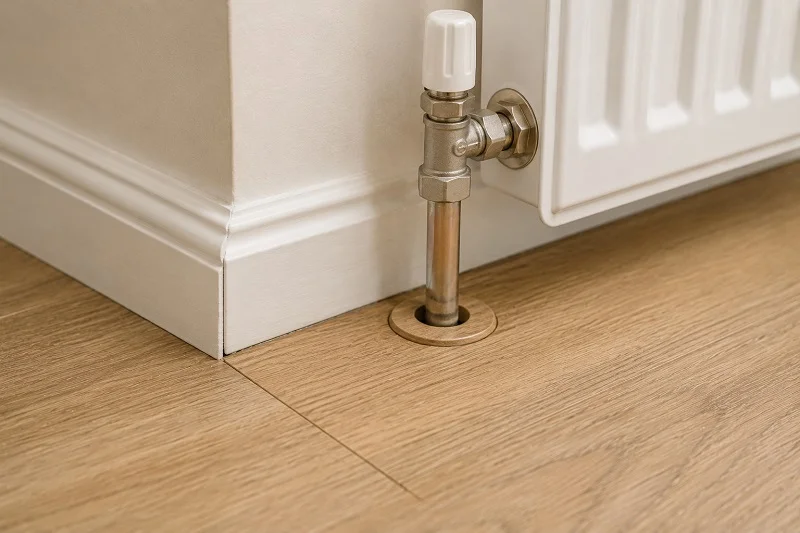
Radiator pipes
- Slide the plank into position next to the pipe and mark the centre point of the pipe on the plank edge.
- Drill a hole 20mm wider than the pipe. So a 15mm pipe needs a 35mm hole. That extra width is your expansion gap.
- Make two angled cuts from the hole out to the back edge of the plank, forming a wedge.
- Fit the main plank around the pipe, then glue the small wedge back in behind the pipe.
- Cover the join with a pipe collar or rose for a tidy finish.
Radiator legs and columns
Make a card template first. Card is cheap, planks are not. Cut and adjust the template until it fits, then draw round it onto the plank.
Door frames and architraves
Always undercut the frame rather than cutting the plank around it. See Step 5.
Kitchen units and appliances
Do not lay laminate under fitted units or a kitchen island. Lay it up to them and leave the expansion gap. The weight of a fitted unit pins the floating floor in place and stops it moving, which causes buckling elsewhere in the room.
Leave enough room to slide the dishwasher and cooker back out later.
Stairs
Laminate on stairs is a different job. Planks are glued and pinned to each tread, and you need stair nose profiles. This is one job that is worth passing to a fitter.
Curved and awkward shapes
Make a card template, transfer it to the plank, then cut with a jigsaw. Test the fit before you click the plank in, because getting it back out is much harder.
13. Laying Herringbone Laminate
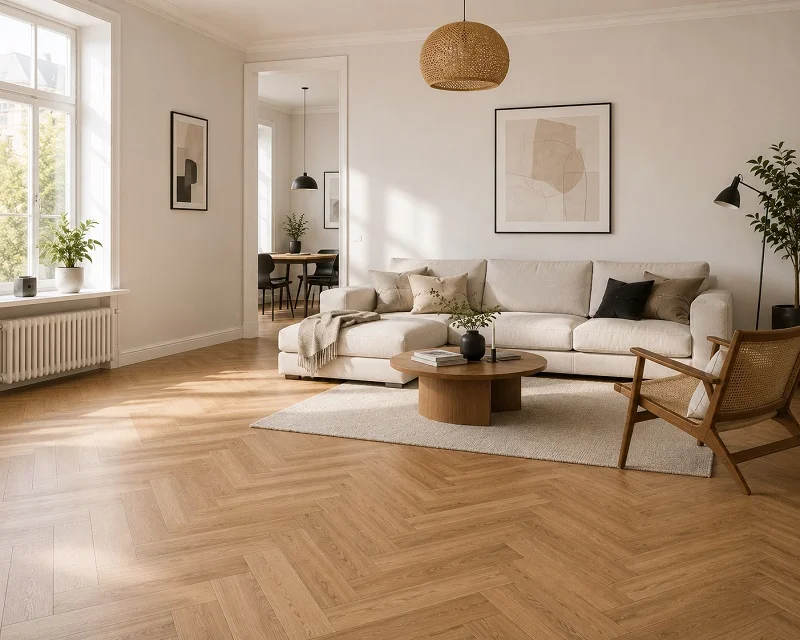
Herringbone comes in left plank and right plank sets. Check both boxes are open before you start, and buy 15% to 20% extra.
- Find the centre line. Measure the width of the room at both ends and snap a chalk line down the middle. Everything works out from this line, not from the wall.
- Dry lay a few rows along the centre line to check how the pattern lands at the walls.
- Build the first V. Click a left plank and a right plank together so they form a right angle, with the point sitting on your centre line.
- Work outwards in both directions, keeping every point exactly on the line.
- Check the angle with a set square every few planks. A herringbone floor that drifts by even two degrees looks obviously wrong across a room.
- Cut the wall edges last, at 45 degrees, keeping the 10mm gap.
- Some ranges include a border plank that frames the pattern. Fit that after the main field is done.
Herringbone takes roughly twice as long as straight planks. Do not attempt it as your first flooring job in a large open room.
14. Room by Room Advice
Living rooms and bedrooms
The easiest rooms. Run the boards towards the window. In a bedroom, choose a thicker underlay for a softer, quieter feel.
Kitchens
Use AC4 rated and water resistant laminate. Silicone the expansion gap all the way round. Fit the floor up to the units, never underneath them. Put a mat in front of the sink and the dishwasher.
Bathrooms and wet rooms
Standard laminate is not suitable. Only use laminate labelled water resistant or waterproof, and check the warranty covers bathroom use. Seal every edge, every pipe and the doorway with flexible silicone. Many fitters would still steer you towards vinyl or LVT here.
Hallways
Choose AC4 or AC5. Hallways take the most traffic and the most grit from outdoor shoes. Run the boards along the length. Fit a large doormat inside the front door.
Conservatories
Conservatories swing between very hot and very cold, which is hard on a floating floor. Use a wider expansion gap of 12mm to 15mm, and pick a laminate that the maker approves for conservatories.
Over underfloor heating
- Check the laminate is approved for underfloor heating.
- Keep the combined tog of underlay and laminate below 2.5.
- Turn the heating off 48 hours before fitting and 48 hours after.
- When you switch it back on, raise the temperature slowly, about 5°C per day.
- Never let the floor surface go above 27°C.
Basements and ground floors with no membrane
Always test for moisture and always use a damp proof membrane over concrete.
15. Laying Laminate Over an Existing Floor
You can save a lot of work by leaving the old floor in place, but only in some cases.
| Existing floor | Can you lay over it? | What to do first |
| Ceramic or porcelain tiles | Yes | Fill grout lines deeper than 4mm, replace loose tiles |
| Sheet vinyl or lino | Yes, if stuck down and flat | Clean well, check no lifting edges |
| Vinyl tiles | Yes, if firmly stuck | Re stick any loose tiles |
| Timber floorboards | Yes | Screw down loose boards, punch in nails, sand high spots |
| Chipboard or plywood | Yes | Check for soft or damaged sheets |
| Engineered or solid wood | Yes, if flat and secure | Same checks as floorboards |
| Carpet | No | Remove it fully, including gripper rods |
| Cushioned or foam backed vinyl | No | Remove it, it is too soft and springy |
| Another floating laminate floor | No | Remove it, two floating layers will move against each other |
Also remember every layer you add raises the floor height. Check your doors, thresholds and the bottom step of any staircase before you commit.
16. 12 Mistakes That Ruin a Laminate Floor
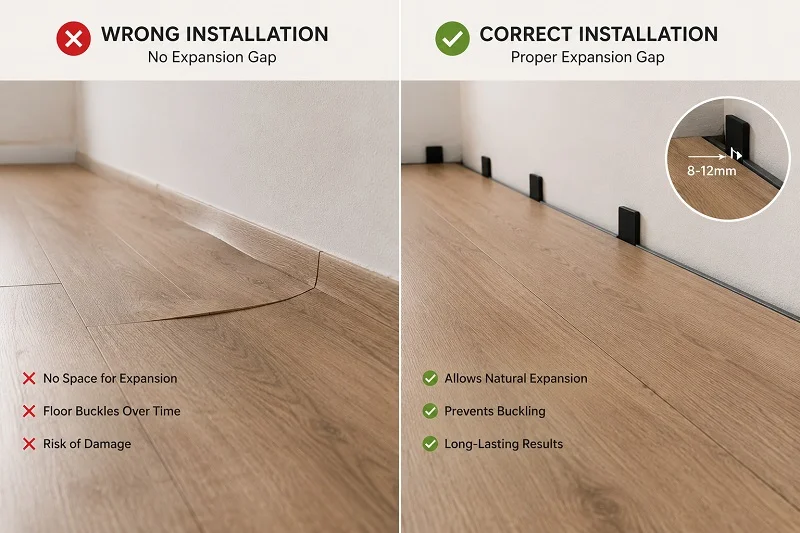
- No expansion gap. The single most common cause of a buckled floor. Always 10mm, always all the way round.
- Skipping acclimatisation. 48 hours costs you nothing and prevents gaps and lifting.
- Fitting on a damp subfloor. Moisture swells the core from below and the damage cannot be repaired.
- Not levelling the subfloor. Dips make joints flex and eventually break. Bumps make the floor rock.
- Overlapping the underlay. Creates ridges you can feel forever.
- Weak stagger. End joints too close together look wrong and make the floor weak.
- Hitting planks directly with a hammer. Crushes the click profile so the joint never closes properly.
- Pinning beading into the floor. This nails your floating floor down and guarantees buckling.
- Laying under kitchen units or a heavy island. Traps the floor and stops it moving.
- Not mixing planks from different packs. You end up with obvious patches of light and dark.
- Forgetting the gap at doorways. Each room needs to be able to move on its own.
- Cutting the wrong way up. Chipped edges cannot be undone.
17. Problems After Fitting
The floor is lifting or peaking in the middle
Almost always a trapped floor. Check whether the expansion gap has been filled, whether beading has been pinned into the boards, or whether a heavy unit is sitting on top. Free the edges and the floor usually settles back down within a few days.
Gaps have opened between planks
Usually dry air shrinking the boards, most often in winter with the heating on. Try a humidifier to bring the room back to 45% to 65% humidity. If the gap stays, lift the planks back to that point with a suction cup and refit them, or fill very small gaps with a matching filler.
The floor creaks or crackles when you walk
This is usually the floor rubbing on a high spot in the subfloor, or a bit of debris trapped under the underlay. If it started straight after fitting, it is a subfloor issue. If it appears near a wall, check the expansion gap.
A plank is chipped or scratched
For a small chip, use a laminate repair kit in a matching shade. For deeper damage, you can cut out and replace the single plank, but it is a fiddly job that involves cutting the damaged board out in sections and gluing the replacement in.
Planks are moving apart at the end joints
Often a stagger that is too short, or a floor laid on an uneven subfloor. Check the joints are fully closed and consider whether a heavy item is dragging the floor in one direction.
Water has got in and the edges have swollen
Swollen HDF cannot be dried back to shape. The affected planks have to be replaced. This is why sealing the edges in kitchens and bathrooms matters.
18. Looking After Your New Floor
- Sweep or vacuum with a hard floor head. Never use a beater bar.
- Mop with a well-wrung microfibre mop and a laminate floor cleaner. Water should not be sitting on the surface.
- Never steam clean laminate. Steam forces moisture into the joints.
- Never use bleach, wax, polish or abrasive cleaners.
- Wipe up spills straight away, especially near the sink and the front door.
- Fit felt pads to all furniture and check them twice a year.
- Use doormats at every outside door. Grit is the main cause of scratching.
- Keep pet claws trimmed.
- Keep the room between 18°C and 24°C with humidity between 45% and 65% all year.
A well-fitted laminate floor with AC3 rating and normal home use should last 15 to 25 years.
19. When to Call a Professional
Get a quote from a fitter if any of these apply:
- The subfloor needs major levelling or a new screed
- You suspect a damp problem
- You want herringbone or a diagonal layout in a large room
- You are flooring a staircase
- The room has curved walls or a lot of built in units
- You have back or knee problems that make hours of kneeling difficult
- The floor came with a warranty that requires professional installation
Even then, doing the prep yourself, such as clearing the room and taking up the old floor, will bring the quote down.
20. Printable Checklist
Before the day
- Room measured and packs bought with 10% extra
- All packs from the same batch
- Planks acclimatising flat in the room for 48 hours
- Underlay and damp proof membrane bought
- Tools gathered or hired
- Beading, threshold bars and silicone bought
- Underfloor heating switched off
On the day
- Room cleared, old floor removed
- Subfloor level within 3mm over 2 metres
- Subfloor dry and vacuumed
- Door frames undercut
- Layout direction decided
- First and last row widths calculated
- Underlay laid, butted and taped
- Spacers in place all round
- First row straight and checked with a line
- Stagger of at least 300mm on every row
- Planks mixed from several packs
Finishing
- All spacers removed
- Beading or skirting fixed to the wall, not the floor
- Threshold bars fitted with the gap maintained
- Wet room edges sealed with silicone
- Floor vacuumed and lightly cleaned
- Felt pads on all furniture
- Spare pack stored somewhere dry
Final Word
Laying laminate flooring looks harder than it is. Once you get past the planning stage, the job settles into a simple rhythm of measure, cut, click and check. Most people who take on a room for the first time finish it in a weekend and wonder why they waited so long.
The parts that decide how good your floor looks are all at the start. A flat, dry subfloor. Planks that have sat in the room for 48 hours. A straight first row. A proper 10mm expansion gap all the way round. Get those four right and the rest of the room almost lays itself.
If something feels off while you work, stop and fix it there and then. A joint that will not close, a plank that rocks slightly, a spacer that has slipped out of place. These are two minute problems on the day and two day problems six months later.
Buy a little more than you need, keep a spare pack somewhere dry, and take your time with the cuts around door frames and pipes. That patience is what makes a DIY laminate floor look like a fitted one.
And if the subfloor turns out to be in poor shape, or you want herringbone in a big open room, there is no shame in getting a quote. Doing the prep yourself and paying a fitter for the tricky part is still a smart way to save money.
You now have everything you need to fit laminate flooring properly. Clear the room, open the first pack, and make a start.
21. Frequently Asked Questions
Do I need underlay for laminate flooring? Yes, unless your planks already have underlay bonded to the back. Underlay smooths small bumps, reduces noise, adds comfort and blocks moisture. Fitting without it usually voids the warranty.
How big should the expansion gap be? 10mm on every edge for a normal room. Go up to 12mm or 15mm for rooms larger than 10 metres across, and for conservatories. The gap is hidden by skirting or scotia beading.
Which direction should laminate flooring run? Along the longest wall, or towards the main source of natural light. On timber subfloors, run the planks across the joists rather than in line with them.
Do I have to remove skirting boards? No, but the result is neater if you do. Removing them lets the flooring slide underneath, so you do not need beading. Leaving them means fitting scotia beading to hide the expansion gap.
How long should laminate acclimatise? 48 hours in the room where it will be fitted, laid flat in its packaging, at normal room temperature. Some makers ask for 72 hours, so check your instructions.
Can I lay laminate flooring over tiles? Yes. Fill any grout lines deeper than 4mm, replace loose or cracked tiles, and check the surface is flat. Then lay your underlay as normal.
Can I lay laminate over carpet? No. Carpet is too soft and springy. The joints will flex and break. Take the carpet, underlay and gripper rods up first.
How much should I stagger laminate flooring? At least 300mm between end joints in adjacent rows. Keep the pattern random rather than making a regular staircase shape.
Do I glue laminate flooring down? No. Modern click laminate is a floating floor and should never be glued or nailed to the subfloor. The only exceptions are stairs and small pieces such as pipe wedges.
How much extra laminate should I buy? 10% extra for straight plank layouts, 15% for diagonal, and 15% to 20% for herringbone. Buy a whole spare pack for future repairs.
Can laminate flooring go in a bathroom? Only water resistant or waterproof laminate, with every edge sealed using flexible silicone. Standard laminate will swell if water reaches the core.
Can I fit laminate over underfloor heating? Yes, if both the laminate and the underlay are approved for it. Keep the combined tog below 2.5, turn the heating off 48 hours before and after fitting, and never exceed a 27°C surface temperature.
Which way up do I cut laminate? Face up with a handsaw or mitre saw. Face down with a jigsaw, circular saw or table saw. The blade should always enter through the decorative surface.
How long does it take to fit laminate flooring in one room? Around 3 to 4 hours for a simple 10m² bedroom and 6 to 8 hours for a 20m² living room, for one person working alone. Add time for subfloor repairs.
How much does it cost to lay laminate flooring? Materials usually run from £12 to £40 per m² depending on quality. A fitter typically adds £8 to £18 per m² in labour. Doing it yourself saves roughly 30% to 45% overall.
Why is my new laminate floor lifting? The most common causes are a missing or blocked expansion gap, beading pinned into the boards, a heavy unit sitting on the floor, or moisture from the subfloor. Free the edges first and see if it settles.
Can I walk on it straight away? Yes. There is no adhesive to cure, so you can put furniture back the same day. Lift heavy items rather than dragging them.
Do I need a damp proof membrane? Yes over concrete or screed, unless your underlay already has one built in. No over timber floorboards, because they need to breathe.